How to Add Multiple Subtitles in Premiere Pro | Step by Step Guide in 2025

Add Subtitle gives brands and creators full control over how their message meets the world. Subtitles, voiceover, and translation—all in one tool to speed up your video workflow.

Adding subtitles in Adobe Premiere Pro is straightforward – until you want to show multiple language subtitles at once. If you're trying to display dual subtitles (for example, English and Spanish) on the same video, you'll quickly discover that Premiere Pro doesn't natively support multiple subtitle tracks being visible at the same time.
So how do you create bilingual captions or multilingual subtitles without wasting hours on manual formatting?
Let's dive into the process—and a faster, smarter alternative.
Why Premiere Pro Doesn’t Support Multiple Language Subtitles Easily
Premiere Pro allows you to create captions using its built-in transcription and captioning tools. However, when it comes to showing dual captions at once, it gets tricky:
You can only activate one caption track at a time.
Importing a second language SRT file disables the first.
Premiere doesn't yet support overlaying two active caption layers.
🎉 Looking for an easier way?
Try Addsubtitle — an AI-powered tool that lets you generate bilingual subtitles in one click. No timeline juggling. No manual formatting. Just fast, multilingual results. Try it free →
Step-by-Step: How to Create Dual Subtitles in Premiere Pro
1. Auto-generate the First Language Captions
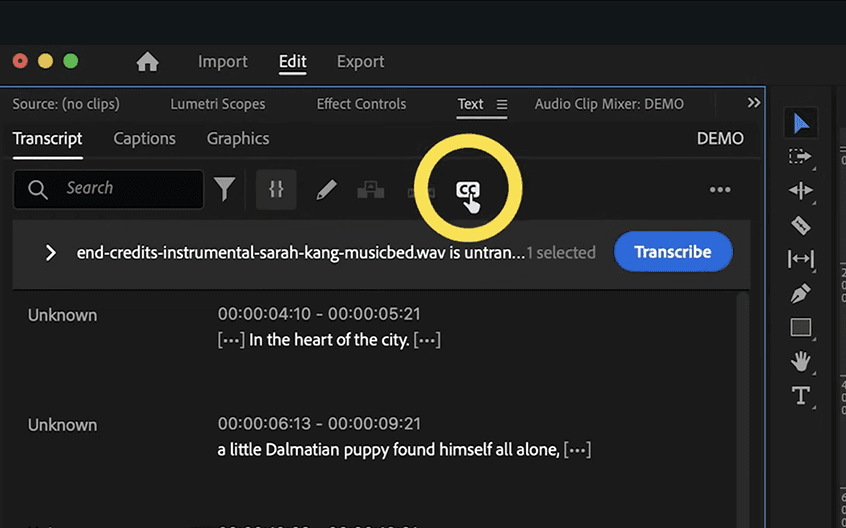
Go to the Text panel.
Click Transcribe Sequence.
Premiere Pro will auto-generate English (or source language) captions using built-in speech-to-text.
Review and correct any errors.
Click Create Captions, then set formatting: e.g., max 30 characters per line, single line, 3 seconds duration.
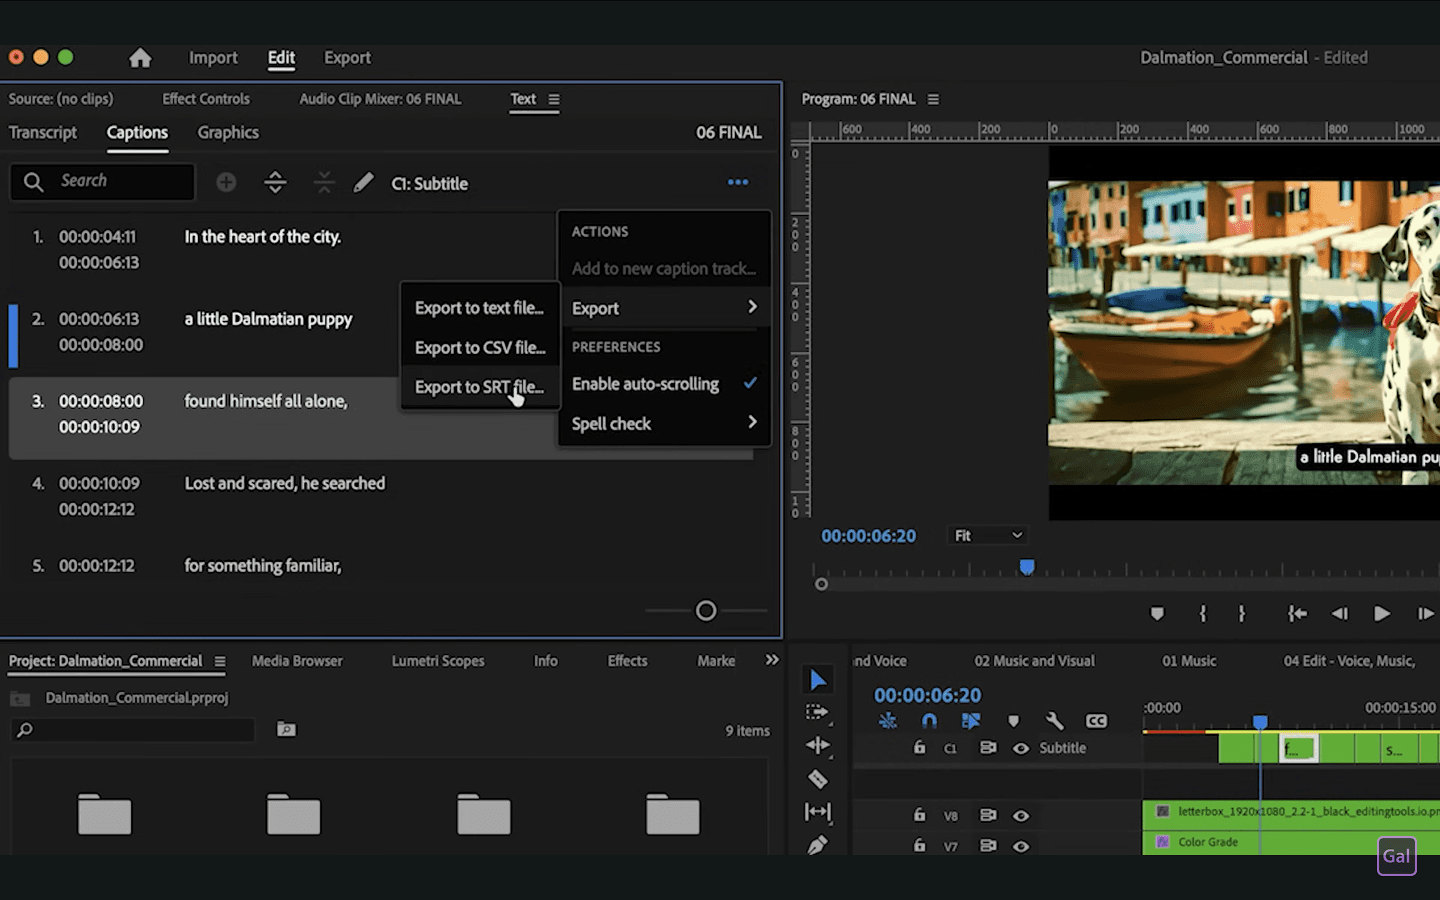
2. Export the First Language as SRT
In the Text panel, choose "Export Captions."
Save the English SRT file. You'll need this for alignment later.
3. Translate the SRT to a Second Language
You can use:
A professional service like Addsubtitle or Upwork translators
Machine translation tools (DeepL, Google Translate)
Ensure the translation is accurate and the timestamps remain unchanged.
4. Import the Second Language Captions
Go back to Premiere Pro.
Disable the existing caption track (hide it).
In the Text panel, click Import Captions, and upload the translated SRT file.
Apply a different style (e.g., color, position) to distinguish it from the first language.

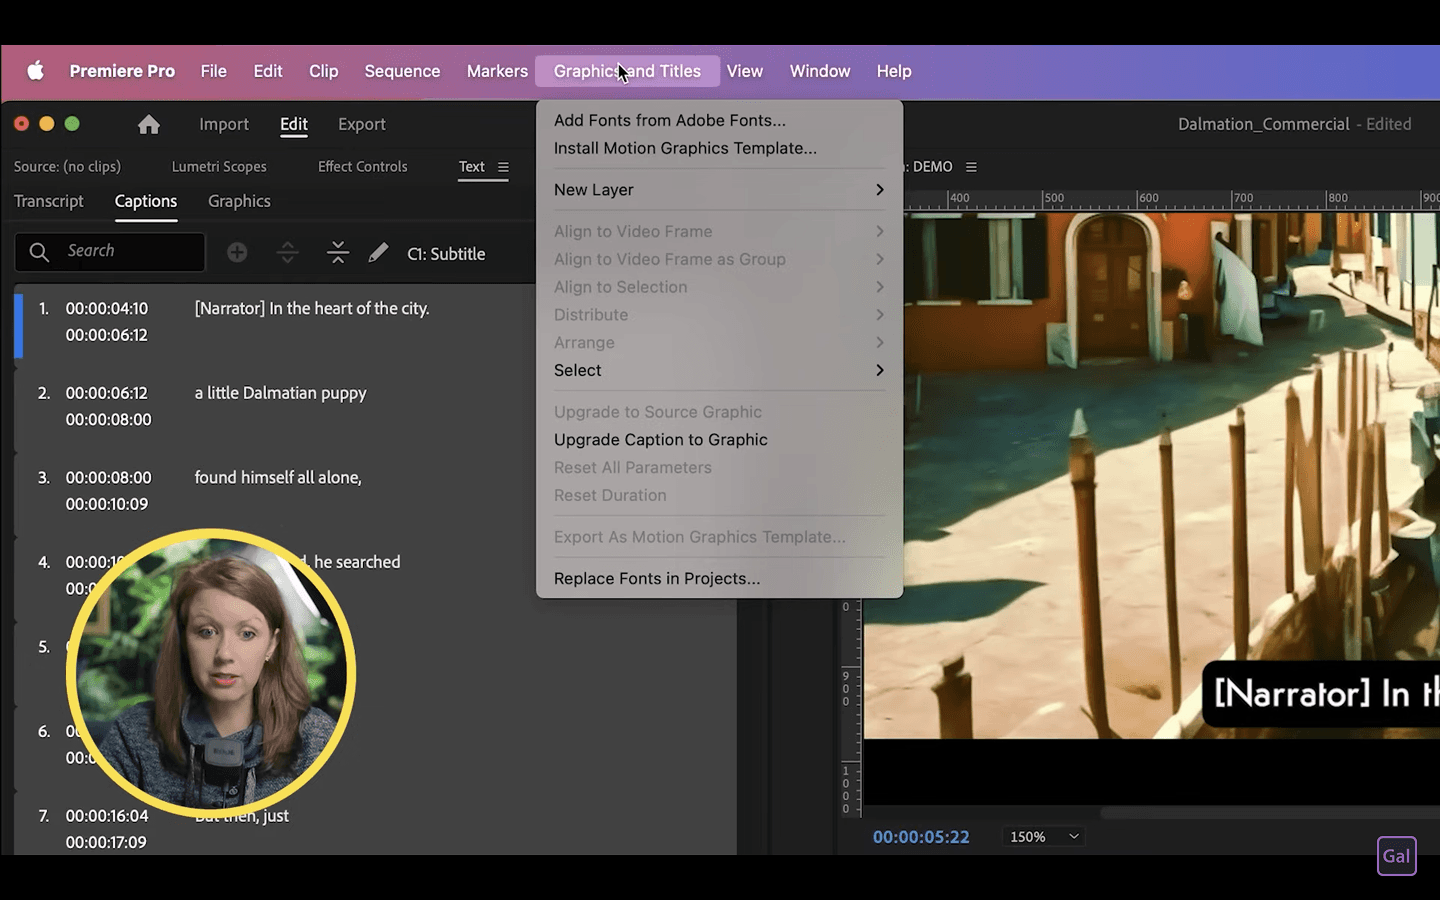
5. Convert the First Language Captions into Graphics
Because you can't display both caption tracks natively:
Select all original captions in the timeline.
Go to Graphics and Titles > Upgrade Caption to Graphic.
This converts captions into editable text graphics.
Adjust font, size, background color, and position (e.g., lower third).
6. Stack and Style the Dual Subtitles
Position the translated captions (second language) higher on screen.
Keep the first language lower.
Use different colors or fonts to make them distinct.
Save each style as a reusable preset.
7. Export the Video with Dual Subtitles
Use Export > Match Source - Adaptive High Bitrate (H.264).
Burn subtitles into the video if needed.
Alternatively, export SRT files for each language to upload separately.
You can also check out this amazing channel and follow along with the video below to use this method!
Why This Method is Powerful (But Not Scalable)
Creating multiple language subtitles this way gives you full control over positioning and style—but it's time-consuming:
Manual translation and syncing
Lots of track toggling and formatting
Hard to update or reuse across videos
For teams, content creators, or marketers producing videos regularly in more than one language, this method can quickly become a bottleneck.
A Simpler Way: Addsubtitle’s AI-Powered Dual Subtitles
Addsubtitle streamlines the entire workflow:
Upload your video or paste a YouTube URL
Select source and target languages
Get multilingual captions in seconds with accurate translation and lip-sync timing
Download dual subtitles as SRT or hardcoded video
Supports 100+ languages
Whether you're localizing content or helping your audience understand across languages, Addsubtitle offers a fast, scalable solution for multiple language subtitles.
Ready to skip the manual hassle? Try Addsubtitle for free today.
It's Free